How to Clean Tile and Grout Without Damage
.
Tile can look durable, but the wrong cleaner, too much water, or aggressive scrubbing can dull a finish and weaken already-damaged grout. The safest approach is to identify the surface, remove loose dirt first. Use the gentlest suitable cleaner, and test it in a hidden spot before working across the room.
To learn how to clean tile and grout safely, work in small sections with a soft brush. Follow the product label, never mix cleaners, and rinse and dry the surface instead of leaving residue behind. Porous stone and recurring mildew need extra caution because cleaning choices depend on the material and the condition of the surface.
This guide covers the supplies to gather, room-specific methods, product cautions, and the signs that a stain is more than surface buildup. If grout is cracked, missing, or repeatedly discolored, Pittsburgh Locks and More offers tile and grout cleaning, repair, and restoration for homes and businesses. Call 724-996-1463 for help or a free estimate, then start by preparing the surface and your workspace.
What You Need Before You Clean Tile and Grout
Before you start, identify what you are cleaning. Ceramic and porcelain tile may tolerate a different approach than natural stone, and grout can be cement-based, epoxy, or another material. The condition of the surface matters too. A cleaning method should account for the stone type, its condition, and the kind of soil present. Research on stone care also emphasizes understanding how a product may interact with the material before using it. Read the Smithsonian-published study on selecting safer stone-cleaning methods for more detail.
If you cannot confirm the tile or grout type, begin with the gentlest reasonable option. Gather clean water, a soft sponge or cloth, and a soft nylon-bristle brush. Avoid steel wool and other aggressive abrasives. Steel wool can remove grout along with a stain and may scratch the surrounding tile, while a soft sponge or nylon brush gives you more control. Start with the least abrasive material rather than assuming a stronger scrubber will produce a better result.
Choose a cleaner that is labeled for your specific surface, and read the directions before applying it. Do not assume that a product safe for one tile or stone is safe for another. If you are uncertain, test the cleaner in a small, inconspicuous area first. Let the test area dry and inspect it for discoloration, dullness, residue, or other unwanted changes before continuing. This extra step is especially important on polished or natural-stone surfaces, where the wrong product may affect the finish.
Plan for ventilation, particularly in a bathroom or any small room. Open a window or door when practical, and follow the product label for gloves, eye protection, dilution, application, and contact time. If using a bleach product indoors, the CDC recommends good ventilation and following the label directions. Review the CDC's cleaner and disinfectant safety guidance before using bleach.
Most importantly, never mix cleaners. Do not combine bleach with another cleaner or disinfectant, since dangerous vapors can result. Use one product according to its label, rinse as directed, and only consider another approach after the surface is clear of the first product. If the tile is cracked, the grout is crumbling, or moisture keeps returning, stop aggressive cleaning and consider whether repair is needed instead.
How to Clean Tile and Grout Safely, Step by Step
A repeatable process helps lift soil without turning a routine cleaning into finish damage. Start with the least aggressive method that fits the surface, especially if you are working with natural stone, older grout, or a finish you cannot identify. The stone type, its condition, and the kind of soiling all affect which cleaning method is suitable. If you are uncertain, test the cleaner in a hidden area first.
- Remove loose soil first. Sweep, vacuum, or wipe away grit before adding liquid. Dirt left on the surface can spread into wet grout and act like an abrasive while you scrub. Use a clean tool rather than one carrying old cleaner residue, since residue can trap more dirt between tiles.
- Choose a suitable cleaner. Begin with warm water and a mild soap or detergent-based cleaner when that is appropriate for the material. In many situations, cleaning with soap and water removes dirt and impurities without requiring a disinfectant. Avoid assuming that a stronger product is safer or more effective. Acidic or otherwise unsuitable products can affect some stone finishes, including polished marble.
- Test before treating the whole area. Apply a small amount to an inconspicuous section and check the tile, grout color, and finish after following the product directions. If the surface changes, stop and choose a different approach. Never mix bleach, disinfectants, or household cleaners. Dangerous vapors can result. If a bleach product is genuinely needed for a suitable application, provide good ventilation, follow its label, and check whether gloves or eye protection are required.
- Work in small sections. Apply the cleaner to a manageable area instead of flooding an entire floor or wall. Small sections make it easier to keep the surface wet for the product's stated use, control water around fixtures, and notice whether the soil is lifting. On a visibly dirty surface, cleaning should come before any separate disinfection step.
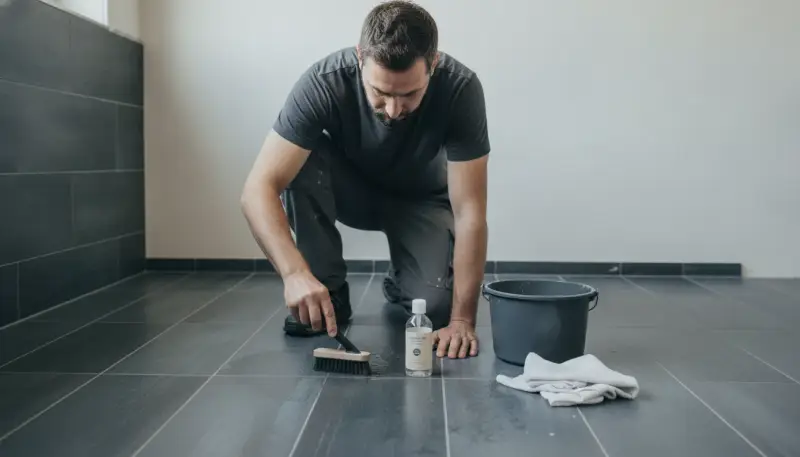
- Gently scrub the grout. Use a soft sponge or nylon-bristle brush and work along the grout lines with controlled pressure. Start with the least abrasive material. Do not use steel wool, which can remove grout and scratch nearby tile. If discoloration does not respond to gentle cleaning, do not keep increasing pressure indefinitely. Persistent staining may reflect damage, moisture, or a finish issue rather than removable surface soil.
- Rinse with clean water. Wipe away the loosened soil and cleaner with clean water, changing the rinse water as needed. Leaving product behind can create film and attract more dirt. Clean equipment also matters, because a residue-covered mop or cloth can put grime back into the joints.
- Dry the surface completely. Use clean towels or allow good airflow to remove remaining moisture, particularly in bathrooms, showers, and around fixtures. Moisture control is central to controlling mold growth. If you are cleaning after a leak, address the water problem promptly rather than treating recurring discoloration as a simple cleaning issue.
- Inspect before repeating. Look for missed soil, loose or missing grout, cracks, movement, leaks, recurring odor, or staining that remains after the surface is clean. Stop aggressive scrubbing when the material appears damaged. Cleaning may improve appearance without restoring cosmetic damage, and repair or restoration may be the better next step.
Call 724-996-1463 for help with tile and grout cleaning or repair.
For larger areas or uncertain materials, a measured inspection can prevent unnecessary chemical use and repeated damage. Pittsburgh Locks and More provides tile and grout cleaning, restoration, repair, and installation for residential and commercial customers. See the tile and grout handyman services available for projects that go beyond routine surface cleaning.
Room-by-Room Tile and Grout Cleaning Tips
The best approach to how to clean tile and grout depends on what the room puts on the surface. Kitchen floors collect tracked grit and food residue, backsplashes collect grease, bathrooms hold soap scum and moisture, and entryways bring in dirt from outside. Adjust the amount of water and agitation to the area instead of using the same aggressive routine everywhere.
Kitchen floors and backsplashes
Start by removing loose crumbs, sand, and grit with a dry mop, vacuum designed for hard floors, or soft brush. Grit left on the floor can be dragged across the tile while you scrub. On a kitchen floor, work in small sections with a suitable cleaner and limited water. A soft sponge or nylon-bristle brush can help lift soil from grout without the unnecessary scratching risk of harsher abrasives. Rinse the section with clean water, then dry it before moving on so residue does not settle back into the grout.
Grease is more common around cooking areas, especially on a backsplash behind the range or prep space. Apply the cleaner to your cloth or sponge rather than flooding the wall, and give it time to loosen the film according to the product directions. Wipe from cleaner areas toward the dirtiest spots, then rinse the surface with a clean, damp cloth. Keep water away from outlets, switches, and countertop seams. If the tile is natural stone or the finish is uncertain, follow the manufacturer's care guidance and test an inconspicuous area first. A safe cleaner depends on the material and the type of soiling, not simply on how strong the product feels.
Bathroom floors and showers
Bathroom floors can hold hair, dust, and soap residue, so remove loose debris before wet cleaning. Use controlled moisture around the toilet base, vanity, and other fixtures. For shower walls and floors, soap scum and dampness may require repeated gentle passes rather than one forceful scrub. Use a soft brush on grout, rinse with clean water, and wipe or squeegee surfaces dry when practical. Never mix cleaning products. The CDC warns that mixing bleach or disinfectants with other cleaners can release dangerous vapors. Ventilate the room and follow the label if a product calls for additional precautions.
Entryways and high-traffic floors
Entryways usually need grit control more than heavy chemical treatment. Dry-remove tracked dirt first, then clean a small area at a time. Rinse the mop or cloth frequently so you are not spreading dirty water between tiles. Finish by drying the floor, particularly near thresholds where moisture can remain unnoticed. If grout is crumbling, tiles move or crack, or stains return because of a leak, stop increasing the scrubbing pressure. Those signs point beyond routine cleaning and may call for tile or grout repair.
Is Vinegar Safe for Tile and Grout?
Not always. Vinegar may be suitable for some glazed tile surfaces, but it is not a universal answer for how to clean tile and grout. Tile material, grout type, sealer, surface condition, and the kind of soil all affect which cleaner is appropriate. A product that seems mild on one surface can dull, etch, weaken, or otherwise affect another finish.
Use the tile and grout manufacturer's care instructions first. If those instructions are unavailable, identify the surface as carefully as possible before choosing a cleaner. Natural stone deserves particular caution. Research published through the Smithsonian explains that stone type, deterioration, soiling, and the way a cleaning product interacts with the material all matter when selecting a safe method: read the study. Do not assume that advice written for ceramic or porcelain tile also applies to marble, limestone, travertine, or another stone.
Test before cleaning the whole surface
When a cleaner's suitability is uncertain, test it in a small, hidden area. Apply it according to the product label, observe the surface after rinsing and drying, and look for changes in color, gloss, texture, or grout appearance. A spot test cannot guarantee that every area will respond identically, but it can help reveal an obvious compatibility problem before it spreads across a floor or shower.
Start with the gentlest suitable cleaner and a soft sponge or nylon-bristle brush. Avoid steel wool and other aggressive abrasives, which can remove grout or scratch nearby tile. Rinse with clean water, then dry the area so cleaner residue and excess moisture are not left in the joints. Never combine vinegar with bleach, disinfectants, or other cleaning products. The CDC warns that mixing bleach or disinfectants with other cleaners can release dangerous vapors, and recommends following product labels and providing good ventilation: see CDC cleaning guidance.
If grout keeps darkening, crumbles, smells musty, or shows staining linked to a leak, stronger chemicals may not solve the underlying problem. Recurring moisture requires attention, and damaged grout may need repair or restoration rather than repeated scrubbing.
How to Handle Mildew, Soap Scum, and Stains
Begin with the gentlest method that fits the surface. Remove loose dirt, apply a mild soap or detergent solution, and work in a small area with a soft sponge or nylon-bristle brush. Rinse with clean water, then dry the tile and grout instead of allowing cleaner residue or standing water to remain. This approach is especially useful for soap scum, light surface mildew, and everyday discoloration. The EPA recommends scrubbing mold from hard surfaces with detergent and water, then drying them completely.
Do not assume that a stronger chemical or a harder scrub is the best next step. Never mix bleach, disinfectants, or other household cleaners, since the CDC warns that dangerous vapors can result. Provide ventilation, follow the product label, and test any unfamiliar cleaner in an inconspicuous spot first. Natural stone and some specialty finishes may react differently to cleaning products, so material identification matters before treating a stubborn mark.
Control moisture before treating recurring mildew
A clean-looking grout line can develop mildew again if the underlying moisture remains. Dry shower walls and floors after use, improve ventilation, and look for leaking fixtures, failed caulk, or water that stays trapped around the tile. The EPA identifies moisture control as the key to mold control and advises fixing plumbing leaks or other water problems promptly. If an odor, darkening, or growth keeps returning in the same area, investigate the moisture source rather than repeatedly applying stronger cleaner.
The EPA uses a 10-square-foot threshold as a point for consulting its remediation guidance when mold growth covers more than that area. Or when there has been substantial water damage. That is guidance for deciding when to seek appropriate remediation information, not a guarantee that a homeowner can safely handle every smaller area. Sewage or other contaminated water calls for a professional experienced with that type of damage. Pittsburgh Locks and More does not claim to provide mold remediation, so do not treat routine tile cleaning as a substitute for specialized remediation when conditions warrant it.
Call 724-996-1463 for help or a free estimate.
Tell cosmetic staining from surface damage
Some discoloration is cosmetic soil that improves with careful cleaning. Other marks remain because mold has stained the material, grout has deteriorated, or moisture has affected the assembly. The EPA notes that mold may cause staining or cosmetic damage that cleaning cannot fully reverse. Stop aggressive scrubbing if grout is crumbling, tiles are loose or cracked, joints are missing, or staining returns quickly. Those signs may call for tile repair, grout cleaning, or grout restoration rather than another round of harsher chemicals. For residential or commercial work, you can review the company's tile and grout services to determine whether repair or restoration is the more suitable next conversation.
When Does Grout Need Repair Instead of More Cleaning?
Cleaning can remove surface soil, soap residue, and some discoloration. It cannot rebuild grout that has started to fail or correct a tile assembly that is moving. Before you scrub harder, inspect the grout lines and the surrounding tile in good light. The goal is to tell the difference between buildup sitting on a sound surface and damage that needs repair or restoration.
Signs that point to cleaning versus tile and grout repairWhat you see.More likely cleanable buildup.Consider repair or restoration.Grout appearance.Surface dirt, soap film, or ordinary staining that improves when gently scrubbed and rinsed.Cracks, missing sections, soft or crumbling grout, or joints that continue to deteriorate.Tile movement.Tiles feel solid and remain aligned when the surface is cleaned.A tile feels loose, rocks under light pressure, sits unevenly, or has a visibly widening joint.Moisture signs.Temporary dampness in a shower or around a recently cleaned area that dries normally.Recurring dampness, a leak, persistent odor, or staining that returns after cleaning and drying.Mildew or discoloration.Light surface discoloration that responds to careful cleaning without harming the finish.Recurring growth, extensive water damage, or cosmetic staining that remains after the surface is cleaned.Do not use increasingly aggressive chemicals to compensate for damaged grout. The EPA notes that moisture control is central to mold control, and recommends fixing plumbing leaks and drying affected items completely. It also cautions that mold can leave staining or cosmetic damage that cleaning may not fully reverse. If a leak, recurring moisture, or contaminated water is involved, address that source before treating the appearance.
Material and finish matter, too. Natural stone and some tile surfaces can react poorly to an unsuitable cleaner, so test any uncertain product in an inconspicuous area and follow the manufacturer's directions. Never mix household bleach or other disinfectants with other cleaners, because dangerous vapors can result. If grout is missing, tiles move, or the surface remains unstable after cleaning, stop scrubbing and have the area assessed.
Pittsburgh Locks and More offers tile and grout handyman services for residential and commercial customers, including tile repair, tile installation, grout cleaning, and grout restoration. A professional can help separate a cleaning project from a repair need and recommend a practical next step without relying on unverified thresholds or promises.
Frequently Asked Questions
What is the best thing to clean tile and grout?
Start with the gentlest suitable cleaner, clean water, and a soft sponge or nylon-bristle brush. Remove loose grit first, work in small sections, rinse away residue, and dry the surface. Test any unfamiliar product in a hidden area, especially on natural stone or a delicate finish. Never mix cleaning products, and follow the product label.
Is it okay to clean tile and grout with vinegar?
Do not assume vinegar is safe for every tile, grout, or finish. Acidic cleaners can harm some natural stone and may dull a polished surface. Check the tile and grout manufacturer's care guidance first, or choose a product specifically labeled as compatible with your material. When the material is unknown, spot-test in an inconspicuous area or ask a tile professional before applying it broadly.
How can I remove mildew from grout?
For limited surface mildew, clean with an appropriate detergent, scrub gently, and dry the area completely. The EPA identifies moisture control as key to mold control, so investigate leaks, poor ventilation, or recurring dampness instead of repeatedly applying stronger chemicals. Never mix bleach or disinfectants with other cleaners because dangerous vapors can result. See the EPA mold cleanup guidance for additional safety information.
When should grout be repaired instead of cleaned?
Stop aggressive scrubbing when grout is cracked, missing, crumbling, or repeatedly discolored, or when tiles are loose or movement and leaks are present. Cleaning removes surface soil, but it cannot correct damaged joints, loose tile, or an ongoing moisture problem. Pittsburgh Locks and More offers tile repair, grout cleaning, and grout restoration for residential and commercial customers, so a professional assessment can help identify the appropriate next step.
Ready to Restore Tile and Grout That Needs More Than Cleaning?
Careful cleaning can improve everyday buildup, but damaged grout, worn surfaces, or recurring stains may call for a more thorough solution. Pittsburgh Locks and More can help with tile and grout cleaning, repair, restoration, or a free estimate. Call 724-996-1463 to discuss the condition of your tile and grout and choose a practical next step.