What should you check before removing old tile?
If you are figuring out how to remove old tile, start by asking what is under it and whether you can safely disturb it. Tile may come off in pieces, but the setting material, underlayment, waterproofing, and hidden utilities can make the job more complicated than it looks. A careful assessment helps you choose between a small do-it-yourself removal and getting help before damage spreads.
Call 724-996-1463 for help or a free estimate
First identify the tile location and the goal. Removing a few cracked tiles to prepare for a repair is different from taking up an entire bathroom floor or stripping tile from a wall. Consider the room, how much tile is involved, what surface you want to keep, and whether plumbing fixtures or cabinets block access.
Look for clues about the layers without prying anything up. Check exposed edges at a doorway, floor register, threshold, or unfinished corner. You may see tile set directly on a stable base, or several layers such as tile, mortar, cement board, plywood, or older resilient flooring. A thick floor can affect door clearance and the final floor height. On a wall, tile may be attached to a backer board that is better removed as a panel than chipped away piece by piece.
Note signs of moisture or movement. Loose grout, hollow-sounding areas, cracked tiles, staining, a spongy floor, or a persistent musty smell can point to a problem beneath the finish. Tile removal exposes the condition; it does not correct a leak or a weak subfloor. If the surface feels unstable or water damage is suspected, identify and address the cause before planning a replacement.
Also consider the age and history of the room. Some older flooring, adhesives, and building materials can contain hazardous substances. You cannot reliably identify these by appearance. If you suspect asbestos-containing material or another hazardous product, do not scrape, sand, grind, or break it. Stop and ask a qualified professional about assessment and safe handling before disturbing it.
When should you pause and get professional advice?
A small area of modern tile on a sound, accessible surface may be a manageable project for someone with the right tools and experience. Stop before demolition if the work involves a large area, several layers, unknown older materials, an occupied building, or surfaces that need to remain intact. The more uncertainty there is about what lies below the tile, the less useful it is to begin by swinging a hammer.
- Possible hazardous material: Do not disturb suspected asbestos-containing flooring, adhesive, or backing. Arrange appropriate testing or professional guidance.
- Water or structural concerns: A soft floor, active leak, damaged framing, or widespread staining needs assessment before new tile covers it.
- Waterproofed areas: Shower walls and floors depend on layers beneath the tile. Chipping at random can damage a membrane and turn a finish project into a water-intrusion problem.
- Utilities nearby: Walls and floors may conceal wiring, plumbing, or heating components. Avoid cutting, drilling, or using powered tools until you know what is behind or below the work area.
- Shared or commercial spaces: Dust, noise, access, and debris can affect other occupants. Plan containment and work timing before starting.
For tile installation, repair, or cleaning questions, you can review the available handyman services and ask what is appropriate for your particular surface. Removal scope depends on the site conditions, so describe what is there rather than assuming every layer can be taken out the same way.
How can you prepare the room?
Prepare the work zone before taking up any tile. Remove furniture, rugs, toiletries, and loose items. Clear a path from the room to the exit so broken tile and waste can be carried out without crossing clutter. Keep children and pets away from the work area. If the project is in a shared home or business, let other occupants know when the area will be inaccessible.
Protect surfaces that will stay. Cover nearby floors and counters with durable protection, and seal doorways where practical to limit dust moving to other rooms. Turn off and secure electrical circuits or water supplies if the work could affect fixtures or concealed services; if you are unsure which controls apply, stop and ask a qualified tradesperson. Do not cover or block ventilation, alarms, or required exits.
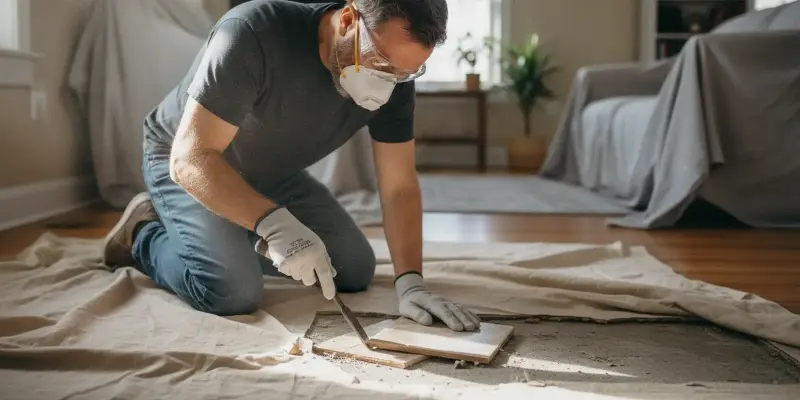
Wear safety glasses, work gloves, sturdy shoes, and hearing protection when appropriate. Tile edges and fragments can be sharp. Demolition can also create fine dust, so use suitable respiratory protection and dust-control methods for the material and tools involved. A simple cloth face covering is not a substitute for appropriate protection. Follow the tool manufacturer's directions, and do not rely on a household vacuum to capture hazardous or very fine construction dust.
Gather only the tools suited to the surface and the size of the job. A small hand chisel and hammer may be enough to lift a few tiles. Larger floor work can require a scraper or powered demolition tool, but power tools can damage the base and create more dust and noise. Have a sturdy container for debris and plan disposal before beginning. Do not overfill containers or carry heavy loads that you cannot safely manage.
How do you remove a few individual tiles?
For an isolated tile on a sound, non-hazardous surface, protect the surrounding area and work slowly. If the tile is cracked, avoid pressing down on it or forcing fragments toward yourself. Use eye protection and gloves, and keep bystanders away. The goal is to release the tile without chipping neighboring pieces or gouging the surface beneath it.
- Clear the grout joint. Carefully remove grout around the damaged tile using a hand grout tool appropriate to the joint. Work away from adjacent tile edges. Do not cut deeply into a suspected membrane, underlayment, or heating system.
- Start at an existing break or edge. If there is a safe exposed edge, set a hand chisel at a shallow angle and tap gently. Avoid driving the tool straight down, which can crack the base below.
- Lift small pieces at a time. Let the existing break guide the work. Do not pry against neighboring tiles as a lever. If the tile will not release with controlled effort, stop rather than applying more force.
- Remove loose setting material cautiously. Scrape only what needs to come off for the planned repair, keeping the tool nearly parallel to the surface. Deep grinding or aggressive scraping may damage the substrate or expose materials that should not be disturbed.
- Inspect the opening. Look for cracks, movement, dampness, or a damaged base. If the cause of the failure is not clear, avoid simply placing a replacement tile over an unresolved problem.
A tile that breaks during removal may leave sharp shards. Pick up larger pieces carefully and use a suitable method for smaller fragments; do not run bare hands over the opening. Keep debris contained and clean the work zone without dry sweeping fine dust into the air.
How do you remove a larger tiled floor?
Taking up a whole floor is a demolition project, not just a sequence of single-tile repairs. Begin at an exposed edge, such as a doorway where the tile layer is visible. Work in a small test area and check how the tile is attached. If it separates cleanly from the base, you may be able to continue with careful scraping. If the mortar is bonded to a thick bed or the tile is attached to an underlayment, removal can become much more demanding.
Use a controlled approach and work in manageable sections. Keep tools pointed away from your body and avoid striking blindly near walls, cabinets, pipes, or electrical equipment. A powered chipping tool can speed removal but may gouge concrete, split plywood, damage a membrane, or create substantial dust. If you cannot see or confirm the condition of the layers, a slower hand method is not automatically safer; pausing for an assessment may be the better choice.
As tile comes up, separate loose debris from material that remains bonded rather than trying to remove every mark at any cost. The next flooring system may have requirements for a flat, clean base, but preparation varies by product and substrate. Follow the instructions for the planned replacement and have damaged or uneven areas assessed. A clean-looking surface is not necessarily sound or ready for new tile.
Large removals can produce heavy, sharp debris. Keep loads small, use appropriate containers, and avoid stacking rubble where it can overload a floor or block a route. Check local disposal requirements before putting construction waste out. Never pour grout, mortar, or tile fragments into a drain.
What is different about removing wall or bathroom tile?
Wall tile can come off with pieces of its backing attached. If the backer board is deteriorated or the tile is firmly bonded, trying to preserve every part of the wall may take longer and cause more damage than removing a planned section of board. That decision depends on the wall construction and the finish that will replace it.
Bathrooms need extra caution because tile is only one part of a water-management system. Behind it may be a waterproofing layer, backer board, plumbing, or a shower valve. A small puncture in a waterproofing membrane can be difficult to see but may allow water into the wall or floor later. Do not use a powered tool near a shower, tub, or plumbing wall unless you know the layers and have a safe plan.
If you are removing tile near a sink, toilet, or other fixture, do not force the fixture or its connections to create working room. Water supplies and drains may need to be isolated or handled by someone qualified. If the work reaches plumbing or electrical components, stop and get the appropriate professional involved. Replacing tile should not leave an uncertain connection hidden behind the finished surface.
After the tile is removed, inspect the backing and surrounding area. Soft, swollen, crumbling, or stained material needs attention before new tile goes in. If you are not sure whether the waterproofing remains intact, do not assume fresh grout will solve it. The repair plan should account for the full assembly, not only the visible tile.
How can you protect the surface beneath the tile?
Decide what is meant to remain before demolition starts. A concrete slab, plywood subfloor, cement backer board, and waterproofed shower assembly each respond differently to impact and scraping. Knowing the intended replacement helps set a sensible stopping point. Removing every trace of thinset is not always necessary, and aggressive cleanup can create a bigger repair.
Work at a shallow angle and check the base frequently. If a tool begins to dig into wood, lift chunks of cement board, or expose a flexible membrane, stop and reassess. Do not try to smooth a damaged area by grinding it without understanding the material and dust controls required. For a floor that flexes, slopes, or has widespread cracks, first find out why; installing new tile over movement may lead to repeat cracking.
Photograph the layers as they are uncovered. A few clear pictures can help explain what you found to a tile professional and make it easier to discuss the next step. Note the approximate area, tile type, location, visible backing, dampness, and any change in floor level. Do not put your hand into a cavity or probe where wires and pipes may be present.
What should you do after the tile is up?
Secure the area and remove debris in a controlled way. Keep sharp pieces in a stable container, and do not leave exposed edges where someone could step on them. Use a cleanup method suitable for the dust and materials involved. If a suspect material was unexpectedly exposed, stop cleaning and disturbing it; seek qualified guidance rather than spreading dust around the building.
Then assess the base before ordering or installing replacement tile. Check whether it is dry, stable, and appropriate for the new finish. Identify any leak, loose panel, crack, or uneven area and resolve it before covering the surface. New tile, mortar, and grout cannot compensate for a failed subfloor or damaged waterproofing.
Plan the replacement around the room's use. A kitchen, entry, bathroom, and commercial space can have different demands for water exposure, traffic, and downtime. Confirm the tile, setting materials, and substrate are compatible, and follow the product installation instructions. If you are comparing repair with replacement, consider the size of the affected area, availability of matching tile, condition underneath, and the disruption each option would involve.
For other household tile care questions, see this guide to cleaning tile and grout without damage. If the next step is a repair or new installation, explain what the removal revealed when requesting a handyman estimate. For a wider view of the communities served, check the Pittsburgh-area service area. Pittsburgh Locks and More is based in Butler and serves Pittsburgh and surrounding communities within an approximately 60-mile radius; travel and timing depend on the job and location.
Call 724-996-1463 to discuss tile repair or installation
How can you decide whether to DIY or get help?
A useful decision is based on the unknowns, not just the square footage. A single loose tile on a known, sound surface may be a limited repair. A bathroom floor over an unknown base, extensive wall tile, suspected hazardous materials, or a job close to plumbing raises the stakes. If you cannot identify the layers or protect what must remain, get advice before demolition.
- Consider a small DIY repair when the tile is accessible, the material is known, the surrounding surface is stable, and you can work without disturbing hidden services.
- Pause for an assessment when the floor is soft, moisture is present, tiles are widely loose, the substrate is unclear, or removal could affect waterproofing.
- Use qualified help when hazardous materials may be present, powered demolition is needed in a sensitive area, plumbing or electrical work is involved, or debris and dust cannot be contained safely.
Before work begins, describe the location, approximate size, tile type if known, signs of damage, and what you want to install afterward. Share photos of visible edges and problem areas, but do not remove a tile just to take a picture. Ask what work is included, what conditions could change the plan, how the area will be protected, and who will handle any plumbing, electrical, or hazardous-material concerns.
Call 724-996-1463 to ask about tile work or request a free estimate
Frequently Asked Questions
Can I remove one tile without damaging the ones around it?
It may be possible if the surrounding tiles are sound and the grout joint can be cleared carefully. Work from an existing edge or break and use controlled force. There is no guarantee that an adjacent tile will not crack, especially if it is already loose or bonded tightly. Stop if the tool begins to chip neighboring tiles or damage the base.
Should I remove old tile before installing new tile?
It depends on the existing tile, the substrate, the finished height, and the installation requirements for the new material. Covering old tile can affect transitions, doors, and the soundness of the finished floor. Have the existing surface assessed and follow the new product's installation instructions rather than assuming either option is suitable.
Is it safe to use a power tool to remove tile?
Powered tools can remove tile quickly, but they also create dust, noise, and a greater risk of damaging the base or hidden components. Use them only when the material and layers are known, you can control dust, and you have the right protective equipment and experience. Do not use a power tool on material suspected of containing asbestos or near unknown utilities.
What if the tile is over a shower or bathroom floor?
Take extra care because the tile may cover waterproofing, backer board, plumbing, and other parts of a water-resistant assembly. A punctured membrane or damaged connection may not be obvious immediately. If you do not know the construction or how to restore the waterproofing, stop and get qualified advice before removing more.
What should I tell someone when asking about tile work?
Share the room, approximate area, whether it is floor or wall tile, visible signs of water or movement, and whether you want a repair or replacement. Mention any known layers or prior repairs and provide photos of exposed edges if available. Describe the location so service availability and timing can be discussed accurately.
Careful tile removal begins with understanding the surface and planning for what comes next. When the layers are uncertain or the work could affect safety, plumbing, or waterproofing, pausing before demolition can prevent a small repair from becoming a larger one.
Add comment
Comments