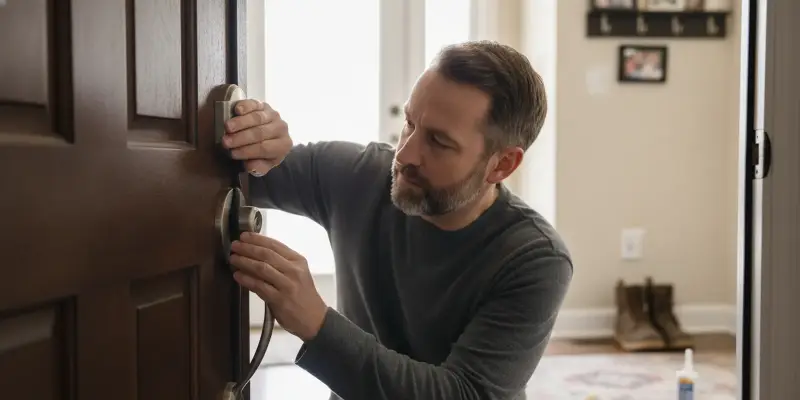
If you feel a draft near a closed door or see daylight around its edges, worn or poorly fitted weather stripping may be part of the problem. This guide to how to replace weather stripping on door explains how to identify the seal, select a compatible replacement, install it with care, and decide when the problem may involve the door or frame instead.
Call 724-996-1463 to discuss the repair or request a free estimate
What does door weather stripping do?
Weather stripping is material fitted along the sides and top of a door or its frame. When the door closes, the material helps reduce gaps between the door and frame. A separate door sweep or bottom seal may close the gap along the bottom edge. These parts can help limit drafts, dust, and moisture getting through openings, though they do not correct every cause of a draft or water leak.
A door can also have a threshold at the floor. The threshold and the door-bottom seal work together, but they are not the same thing as the strips on the sides and top. It helps to identify which part is worn before buying materials. Replacing a side strip will not solve a gap beneath the door, and adding a sweep may not fix a loose or misaligned door.
Weather stripping is not a substitute for repairing a damaged frame, correcting a door that will not latch, or addressing a significant water intrusion problem. It is a small component in a larger doorway assembly. If you are unsure whether the issue is the seal, the door, or the frame, inspect the whole opening before choosing a repair.
How can you tell whether the weather stripping needs replacement?
Look at the door while it is open, then inspect the seal with the door closed. Worn weather stripping may be flattened, cracked, brittle, torn, loose, or missing in sections. Foam or rubber that no longer springs back may have stopped making consistent contact. If a strip pulls away from its channel or adhesive, it may need to be refitted or replaced.
Check for gaps around the perimeter with the door shut. Look for uneven spaces, visible daylight, or areas where the strip does not touch the door. You can move a hand near the edges to notice air movement, but do so on a windy day if possible; indoor air circulation can otherwise be misleading. A piece of paper caught between the closed door and seal can offer a rough comparison: if it slides out easily in one place but is held in another, the seal pressure may differ. This is only a check, not a measurement of energy performance.
Notice how the door operates. If it takes unusual force to close, rubs against the frame, or no longer latches smoothly, a replacement strip that is too thick could make the trouble worse. A door that sags, a loose hinge, or a shifted frame can create uneven gaps that a new seal will not fix. Check the hinge screws and visible alignment, but do not force the door shut to compress an oversized seal.
For a more complete check of the opening, review the company’s handyman services information and ask whether the particular door repair is within scope. For a separate issue involving a lock, latch, or home security, see the locksmith services page.
What kind of replacement weather stripping should you choose?
Identify how the current material attaches before shopping. Common styles include adhesive-backed foam, compression seals, and strips that fit into a groove or channel in the frame. Some doors use a flexible vinyl or rubber profile, while others have a metal or rigid carrier with a flexible sealing edge. The existing door and frame determine what fits; products that look similar on the shelf may not attach the same way.
- Adhesive-backed foam: Often used for simple surface applications. The door or frame surface must be clean, dry, and suitable for the adhesive. It may not be the right option if the original design uses a channel or if the door needs a precise compression profile.
- Compression or kerf-in seals: These use a shaped flexible strip, sometimes inserted into a narrow groove. Match the groove and profile. Pulling out the old strip first can help identify the attachment method, but avoid damaging the channel.
- Door-bottom seals: A sweep or bottom seal attaches to the lower edge of the door or fits against the threshold. Choose one that matches the door construction and closes the gap without dragging or preventing the door from opening.
Take a clear photo of the existing seal and its attachment point. If possible, remove a short piece of the old material only after confirming it can be taken out without damage. Bring the sample or its measurements when selecting a product. Check the product directions for the intended location, door type, measurement method, and installation steps. Do not assume that one universal strip works on every entry door.
What tools and preparation do you need?
The materials depend on the seal style. For a straightforward replacement, you may need a tape measure, pencil, utility scissors or a suitable cutter, cleaning cloth, and the replacement strip. Some types require a screwdriver or another tool specified by the manufacturer. Use eye protection when cutting or removing a rigid strip, and keep blades pointed away from your hands and body.
Before removing anything, take a photo of the full perimeter and close-ups at corners and joints. Note where the old strip begins and ends, and whether it is attached to the door or the frame. If the door has several seal pieces, mark which one came from each side. This gives you a reference for the new material and reduces the risk of mixing up different profiles.
Read the package instructions before cutting. Some materials should be measured in place; others need a small amount of extra length or a particular corner treatment. Follow the product’s own guidance rather than guessing. Avoid applying adhesives to damp, dusty, peeling, or freshly painted surfaces unless the directions explicitly allow it.
How do you replace adhesive-backed weather stripping?
- Remove the old strip carefully. Peel it back slowly and work along the frame. If it resists, use the method recommended for the product or surface. Do not gouge wood, damage paint, or pry against glass. If adhesive residue remains, use only a cleaner that is suitable for the surface and follow its label.
- Clean and dry the contact area. Remove dust and loose residue. Let the surface dry fully before placing new adhesive. A strip applied over debris may not adhere evenly.
- Measure each side separately. The top and two sides may differ in length. Measure the area where the seal belongs and check any product-specific instructions for allowances at the ends or corners.
- Cut and test-fit the pieces. Use a clean, square cut where appropriate. Hold each piece in place before peeling the backing. Make sure the strip will not block hinges, the latch, or other moving hardware.
- Apply the new seal in manageable sections. Peel away the backing gradually and press the strip onto the intended surface without stretching it. Keep it aligned and avoid bunching at the corners.
- Close the door gently and check the fit. Confirm that it latches and opens normally. If it is difficult to close or the seal buckles, stop and reassess the thickness, position, or product compatibility instead of forcing it.
For adhesive products, follow any stated curing or settling directions before repeated use. Do not add extra layers simply to fill a gap unless the product instructions call for it. A thick or uneven seal can put pressure on the door and hardware or keep the latch from engaging.
How do you replace a channel or kerf-in seal?
Channel-style seals fit into a groove or kerf. The new strip must have a compatible attachment stem and sealing profile. Start by opening the door and examining how the existing material enters the frame. If the old strip comes out easily, remove it in a controlled way and preserve a sample. If it is stuck, the channel is damaged, or removal starts splintering the frame, stop rather than widening the groove.
Measure the runs and compare the replacement profile with the original. Install according to the manufacturer’s directions, keeping the material seated evenly from top to bottom. Do not stretch the strip during installation; stretched material can pull back and leave a gap. At the corners, follow the product’s prescribed method. Some seals are cut to meet neatly; others have a specific corner or joint arrangement.
After fitting, close the door slowly. Look for a continuous, even contact line and check that the door remains easy to operate. If the strip repeatedly pops out, the profile may be wrong or the channel may need repair. Forcing a mismatched seal into place can damage the frame and make a later repair more difficult.
How do you fit a door sweep or bottom seal?
First confirm that the draft or gap is actually under the door. Inspect the threshold and the door’s bottom edge. If the threshold is damaged, loose, or uneven, a new sweep may not make a reliable seal. A sweep that is too low can scrape the floor, drag across a rug, or make the door hard to open. One that is too short or incorrectly positioned can leave gaps at the ends.
Check the product directions for the correct mounting position and how to measure. Depending on the design, a sweep may attach to the inside face or bottom edge of the door. Ensure it will clear the floor as the door moves. If instructions permit trimming, measure carefully and cut the sweep to the specified size. Attach it using the supplied hardware or method, then open and close the door several times to check for scraping, catching, or an incomplete seal.
Do not alter a threshold or cut into a door if you are unsure what is underneath or how the assembly is built. A visible gap can also come from a door that is out of alignment or a floor that is not level. These conditions may need a different repair than changing the sweep.
What should you check after installation?
Close the door and inspect the top and both sides. The seal should meet the door consistently without large gaps or folded sections. Try the latch and handle several times. The door should not need a forceful push to close, and it should not swing open because it is being pushed by an overly thick seal.
Check the bottom seal separately while opening and closing the door. Look for rubbing or a sweep that catches on the floor. If the seal is adjustable, make small changes according to the product instructions and retest. Avoid cutting or trimming more material until you have confirmed where the interference occurs.
Recheck the fit after the material has been used for a short period. Some strips can shift or loosen if the surface was not prepared well. If the same gap remains, diagnose the location instead of adding more material: the cause could be a worn seal, an uneven threshold, loose hinges, a misaligned door, or a damaged frame.
What mistakes can make the problem worse?
- Buying by appearance alone: A similar-looking strip may not match the existing groove, carrier, or door bottom.
- Measuring only one side: Different runs may need different lengths, and the corners may require a particular fit.
- Stretching the strip: Material can retract or leave uneven gaps if it is pulled tight during fitting.
- Installing over a dirty or wet surface: Adhesive may fail to hold as intended.
- Using excessive thickness: This can make the door hard to latch and put unnecessary pressure on hardware.
- Ignoring alignment problems: A new seal cannot correct a sagging door, loose hinge, or damaged frame.
- Using a blade carelessly: Cutting toward your hand or working near glass increases the chance of injury or damage.
- Assuming the seal fixes every leak: Water entry may involve the threshold, exterior trim, drainage, or another part of the opening. Address the source rather than concealing the symptom.
How can you tell a seal problem from another source of a draft?
Drafts can be hard to trace because air movement may travel along a wall or floor before you feel it. Compare the edges of the closed door rather than assuming that the coldest spot identifies the exact opening. Check the seal all the way around, including the lower corners, and note whether the gap is consistent or changes with the door position. A uniform gap beside an intact seal suggests a different fit issue from a split or missing section of material.
Also inspect the threshold and the exterior edges of the frame from a safe, accessible position. Look for loose trim, obvious damage, or signs that moisture is entering. Do not remove exterior components or apply caulk over an unexplained leak simply to cover it. Water can follow a path from elsewhere, and blocking a drainage opening can create another problem. Persistent moisture, soft or swollen wood, or damage around the frame deserves more than a weather strip replacement.
If the door only seems drafty on windy days, note the wind direction and which edge feels affected. If the problem changes after opening and closing the door, the seal may have shifted or the door may not be sitting consistently against the frame. These observations help narrow down what to inspect, but they do not prove the cause. Keep notes or photos so you can explain what changes and when.
When is it better to ask for help?
A simple, accessible adhesive strip can be a manageable do-it-yourself job when the existing seal is easy to identify and the door is aligned and operating normally. Consider professional help if the door will not latch, the frame is damaged, the gap changes from top to bottom, the threshold is loose, or you cannot identify a compatible replacement. It is also sensible to ask for help if removing the old material risks damaging a painted or finished surface.
For a lock or latch problem, a locksmith can help assess the hardware and related door operation. For a general property repair, contact the business to discuss whether the work fits its handyman service scope. Pittsburgh Locks and More serves Pittsburgh, Butler, and surrounding communities within an approximately 60-mile radius, with its base in Butler. Travel and timing may depend on the job and location, so share the address or area when asking about availability. See the service area information for more context.
Call 724-996-1463 to explain the door issue and ask about an estimate
How should you prepare before requesting an estimate?
A few details can help describe the issue clearly. Note whether the draft is at the top, sides, or bottom; what kind of door it is; and whether it closes and latches normally. Take photos of the existing seal, the gap, and any visible damage to the frame or threshold. Mention if the material has already been removed or if an earlier repair changed the fit.
If the property is a rental or commercial space, coordinate access with the owner, tenant, or manager before scheduling. Identify which doors need attention and whether any are used frequently or provide access to a shared area. This helps distinguish a single worn strip from a broader maintenance concern. The company describes a combination of locksmith and handyman work; its about page offers additional business information.
Weather stripping is a relatively small part, but door operation and security still matter. If the door does not close securely, the latch is unreliable, or the frame is visibly damaged, explain that when you call rather than treating the issue as only a draft.
Frequently Asked Questions
Can I replace weather stripping without removing the door?
Often, yes. Many frame-mounted seals and adhesive strips can be replaced with the door open and still attached. A particular product or door-bottom design may require a different approach. Follow the manufacturer’s directions and do not remove the door unless the work requires it and you can support it safely.
How do I know whether to replace the side seal or the bottom sweep?
Look at where the gap appears with the door closed. A gap along the jambs or top points to the perimeter seal; a gap beneath the door may involve a sweep, threshold, or alignment. If more than one edge has a gap, check the door’s position and frame before replacing individual pieces.
Can a thicker seal stop a draft better?
Not necessarily. A seal that is too thick can prevent the door from closing or latching smoothly. Choose a profile intended for the door and frame, and check that the door operates normally after installation.
What if a new strip does not stop the draft?
Recheck its location and contact with the door, then inspect the threshold, hinges, frame, and door alignment. Air movement may also come from another nearby opening. If you cannot find the source or the door operates poorly, ask for an assessment rather than layering on more material.
Call 724-996-1463 to discuss a door repair or request a free estimate
Careful measurement and a compatible replacement can resolve a worn-seal problem, but gaps caused by alignment or frame damage need a different fix. Check how the door closes after any work and seek help if it will not latch or operate normally.
We pride ourselves on our adaptability and commitment to excellence in every aspect of our service. Explore what we have to offer and how we can contribute to your success.
Add comment
Comments